Board layout and routing

1332_ffa70edf

Using a COM Module and a carrier board is often a cost-effective strategy. The COM module is a standard product, verified and ready to be used in the design. Thus complications involved in hardware design for the processor and chipset are not your headache. The hardware design challenges are limited to the carrier board.

The carrier board is where functions, components and interfaces needed for your specific application are placed. An embedded design based on a COM module and a carrier board allows you to stay focused on your core competence.This article is a guide for developers that are new to carrier board design. The purpose is to describe board layout, routing and calculations of trace widths and spaces to match impedance requirements in order to succeed with a COM module design.

Discussions are based on an example of a typical measurement application for the Hectronic H6042 ARM COM module with an FPGA onboard. The application involves sampling of data at a high speed and signal processing in real-time. GPS technology adds information to place the measurements on a map. Output is transmitted using GPRS, via USB connection or through Ethernet. This is a rather realistic scenario for measurement products and the perfect fit for H6042.

Functional structure

The FPGA on the COM module is used to collect and process data, which is the bigger task in this application. A relatively small processor, in this case an ARM9, is sufficient for control purposes as the FPGA takes on the heavy load in terms high speed data collection and signal processing. The H6042 comes with Ethernet and USB onboard.
Analogue circuitry for measurement, A/D and D/A converters, that feed data to the FPGA, is placed on the carrier board. The FPGA core needs SRAM for high-speed data buffering and storage during the processing. Since SRAM is not included on the module it’s placed on the carrier board.rather realistic scenario for measurement products and the perfect fit for H6042.
The FPGA on the COM modrather realistic scenario for measurement products and the perfect fit for H6042.

Signal pre-processing

High performance time critical data acquisition with signal preprocessing is a perfect task for an FPGA. The function to sample from the A/D conversion with low sampling jitter is easily implemented in the FPGA of the H6042. One of the advantages using an FPGA is that the speed of the sampling is independent of variations in the CPU load.High performance time critical data acquisition with signal preprocessing is a perfect task for an FPGA. The function to sample from the A/D conversion with low sampling jitter is easily implemented in the FPGA of the H6042. One of the advantages using an FPGA is that the speed of the sampling is independent of variations in the CPU load.

GPS and GPRS

GPRS modem connection and GPS function is included in the application using standard modules available from various suppliers. These modules are typically very straight forward to use and shouldn’t introduce any complications even if engineers have no experience in using GPS and GPRS from other projects. GPS and GPRS modules often have USB equivalent interfaces or TTL level serial port signals. The modules need power supply and most often quite large capacitors on the carrier board are required to bulk power for peaks in the power consumption of the GPRS transmitter.

Carrier board layout and routing

The carrier board PCB would typically be a four or six layer design. Two layers should be planes, one plane for power and one plane serving as grounding layer. An important objective for these layers is to ensure correct impedance matching of the signals.
Screenshot 2019-02-22 at 10.01.00

Using a split power plane imposes restrictions on signal routing. Critical signals routed passed the splits in the power plane may cause bad signal quality, slow rise times and introduce ringing. The reasons can be found in the laws of physics.


The return currents from the signal in a trace will pass through the ground plane to form a closed current loop. The return currents will strive to lead a path through the ground plane as close to the trace as possible, and thereby form a “mirror image”, a “shadow” of the tracing in the ground plane.

The ideal situation is when the return path in the ground layer is of the same length as the signal trace. If the return currents are forced to take a detour around a split in the ground plane the path of the return current is longer than the ideal path. That disruption of harmony causes bad signal quality and disturbing electromagnetic fields.

Carrier board PCB – Calculation of impedances

Impedance and propagation delay are dependent on the number of layers and the material used in the carrier board PCB, the width of the traces and the spaces between traces in circuit layers. The main factor is the dielectric used between the board and the layers. PCB vendors have their respective preference in which dielectric they use. It’s wise to consult the PCB vendor before finalizing the routing of the carrier board.

It is possible for you to calculate and specify the carrier board PCB. There are computer programs that perform the required analyzes for the task. However it’s common practice for PCB vendors to support you with this. Why not use that service to make things easier. They will calculate and suggest appropriate properties for the carrier board PCB to suit your application.

Here is what you need to do:

1.    Prepare estimates and requirements for the PCB vendor
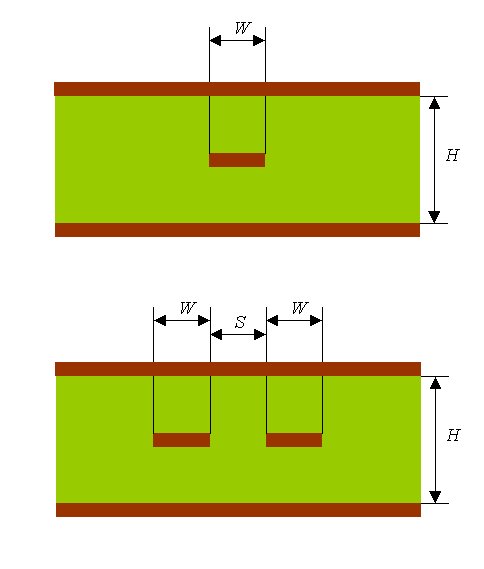
The PCB vendor will need input from you for their calculations. Calculate an estimation of trace widths and spaces using the equations stated below. Make your best guess on how many routing planes you need in the board. List the impedances that your application requires.


A typical substrate to use is FR4. The FR4 substrate have a typical relative permittivity of 4.5 to 4.9.

2.    Contact the PCB vendor
Communicate your listings of required impedances, your best guess on the numbers of routing layers and approximated trace widths and spaces with the vendor. From your input they will perform calculations and reply with the accurate figures for your case and for the dielectric they prefer.

3.    Finalize layout and routing
Now you are equipped with all the relevant and correct data to finalize carrier board layout and routing.

Microstrip – Equations to calculate trace widths and spaces

504_e643d0ef
502_e7d1a739

Magnitudes used in equations

505_e643d0ef
503_e7d1a739

A typical result

The following data are examples from an actual project building a 6 layer carrier board. It gives you an idea on what you can expect from the above calculations.

100 ohms differential pairs impedance for Ethernet traces:

4,9 mils trace width, 6,2 mils spaces


90 ohms differential pairs impedance for USB traces:

5,8 mils trace width and 5,2 mils spaces.


55 ohms characteristic impedance:

5,4 mils on top and bottom layer, and 5,6 mils on inner layers.

USB and Ethernet

USB and Ethernet signals are routed as differential pairs. The differential impedance of the USB differential pair should be 90 ohms +/-10%. The differential impedance for the Ethernet signals should be 100 ohms +/- 10%.  An Ethernet connector with integrated magnetic saves PCB space and simplifies the work doing board layout. Separate connector and magnetic  require more space on the carrier board and additional signal traces to connect them.

These differential signal traces should have as few vias as possible. The paired signals should be correctly phased, so if an extension is needed to reach an end pin, length compensation by wrinkling on the paired signal should be done in the end that corresponds to the extension.

500_a6d456e6

USB and Ethernet auto-routed to a double USB and Ethernet connector. Note the wrinkling on one of the traces in a pair of traces to compensate for the difference in trace length between the two pair of pins.

FPGA high speed SRAM routing

In order to utilize a fast SRAM the bus signal traces must be matched in terms of length and the characteristic impedance needs to be adapted. The H6042 module has a PCI-bus routed signal set from the FPGA to the connector. These signals are recommended to use for signals between FPGA and SRAM. The characteristic impedance of the PCI bus in H6042 is 55 ohms. Use the same impedance for the signal traces to the SRAM on the carrier board to minimize signal reflections coming from the connector.

If signal traces are used for high-speed data communication, the propagation delay needs to be considered. High-speed data communication in this case is for instance PCIe, Firewire or high-speed USB 2.0 compatible data speeds. The propagation delay is shorter at top and bottom layers than in inner layers.

501_a6d456e6

Example of auto-routed matched signal length for SRAM bus to the FPGA, using the PCI signals on H6042. Note the many wrinkles to match length of traces on the bus.

COM module and carrier board stack

When building a board stack it is very important to have a good grounding connection between the COM module and the carrier board. All ground and power pins in the board-to-board connectors should be connected straight down to its respective plane. It’s recommended to fasten the COM module on the carrier board with metal screws in the corner holes of the COM module.
  • Subscribe to news

Required

Get contacted

We get back to you as soon as possible

Required
This site is protected by reCAPTCHA and the Google Privacy Policy and Terms of Service apply.